Introduction to Pelvic Mobility Flow
Pelvic Mobility Routine to Release Tension & Improve Flexibility
This pelvic mobility routine strengthens your core, stretches your lower back, and gently massages your pelvic organs. With consistent practice, it can help reduce menstrual cramps, reduce back pain, and prepare your muscles for an easier childbirth. It also helps mobilize your hips and pelvic joints, making it a valuable practice for improving overall movement.
This routine is a great foundation for dance movements and enhances alignment in yoga postures. As your pelvis becomes more flexible, you’ll find it easier to move freely and confidently in both yoga and dance.
Movements like medium hip circles help tone your waistline and core muscles. They’re fun, easy to do, and fit well with different types of music. You can practice them standing, kneeling, or on all fours—whatever feels most comfortable for your body.
🔄 Movement Breakdown:
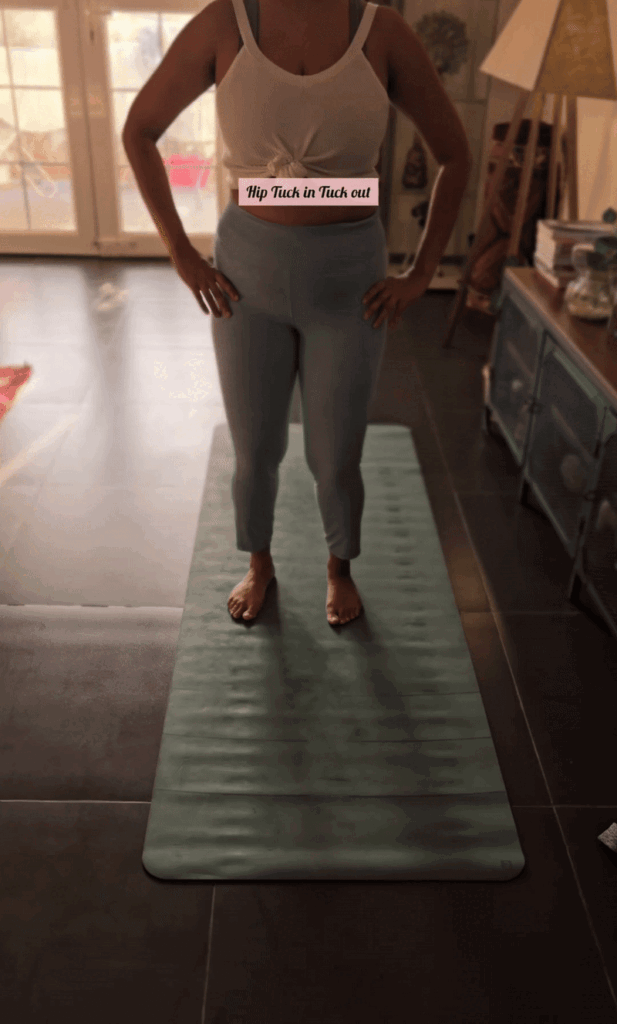
1. Standing Hip Tuck-In & Tuck-Out

Description:
Stand tall with your knees soft or slightly bent. Keep your chest lifted and shoulders relaxed back. This movement comes from the pelvis—not the spine.
How to Do It (with Verbal Cues):
Tuck your pelvis in by gently pulling your lower belly inward.
🗣️ “Imagine you’re zipping up tight jeans — scoop your lower belly in and tuck your tailbone under.”
As you do this, your lower back will naturally round slightly.
Then, release the contraction and tilt your pelvis forward.
🗣️ “Now imagine you’re pouring water out of a bowl resting on your pelvis — tip it forward and let your lower back gently arch.”
Repeat this rhythm:
👉 Tuck in (scoop and zip) → Tuck out (pour and tilt)
What It Works:
Strengthens your core
Mobilizes your lumbar spine
Builds awareness of pelvic alignment
Duration:
5–8 slow, controlled reps
What it works: Engages core, mobilizes lumbar spine.
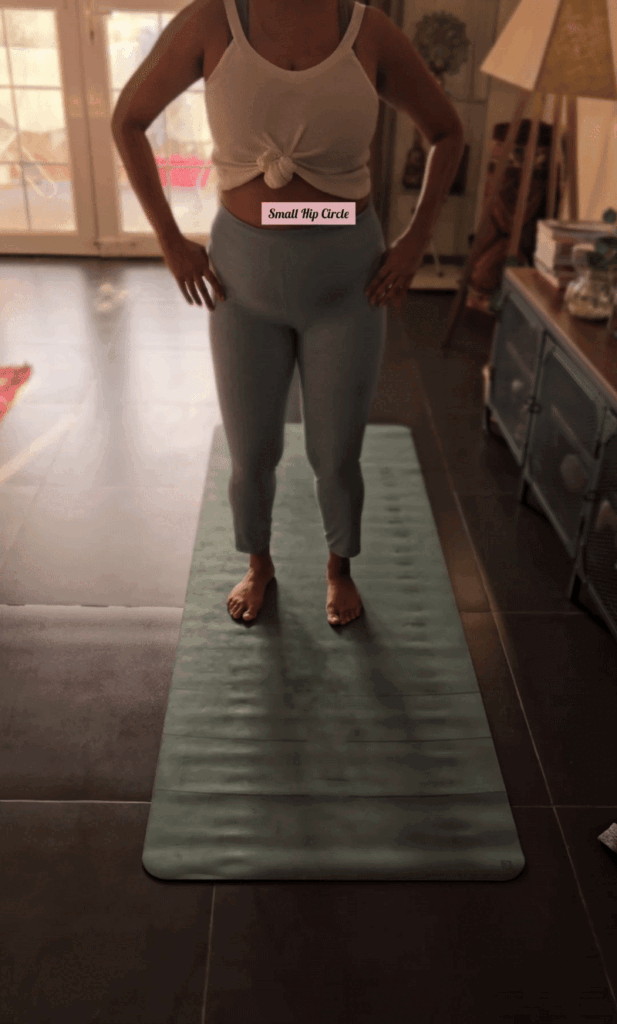
2. Small Hip Circles (Standing)

Description:
Stand with your feet hip-width apart and knees softly bent. Keep your chest lifted and your shoulders down and relaxed. This movement focuses on isolating the pelvis while strengthening and stretching the side obliques.
How to Do It (Step-by-Step with Verbal Cues):
- Start at the center with both knees softly bent and pelvis neutral.
- Lift your right hip up toward your right ribcage.
🗣️ “Feel your right side shorten. Your right knee straightens slightly while your left knee stays softly bent.” - Return to center and tuck your pelvis in — both knees bend evenly.
🗣️ “Scoop the lower belly in, tailbone tucks under.” - Now lift your left hip up toward your left ribcage.
🗣️ “Let your left knee straighten slightly as the right knee stays bent.” - Return to center and tuck your pelvis out, allowing a gentle arch.
🗣️ “Tip the pelvis forward, imagine pouring water out of your pelvis.”
🔁 Continue in this circular motion — right up → tuck in → left up → tuck out — in a controlled and mindful way.
Important Tips:
- Do not slide your hips side to side — instead, focus on lifting each side up toward the ribs.
- Do not lock your knees — keeping them soft makes the movement accessible.
- Stay connected to your core and side waist as you move.
What It Works:
- Mobilizes your pelvic joints.
- Strengthens and stretches the obliques
- Builds awareness of isolated hip control
Duration:
5–8 circles in one direction, then reverse
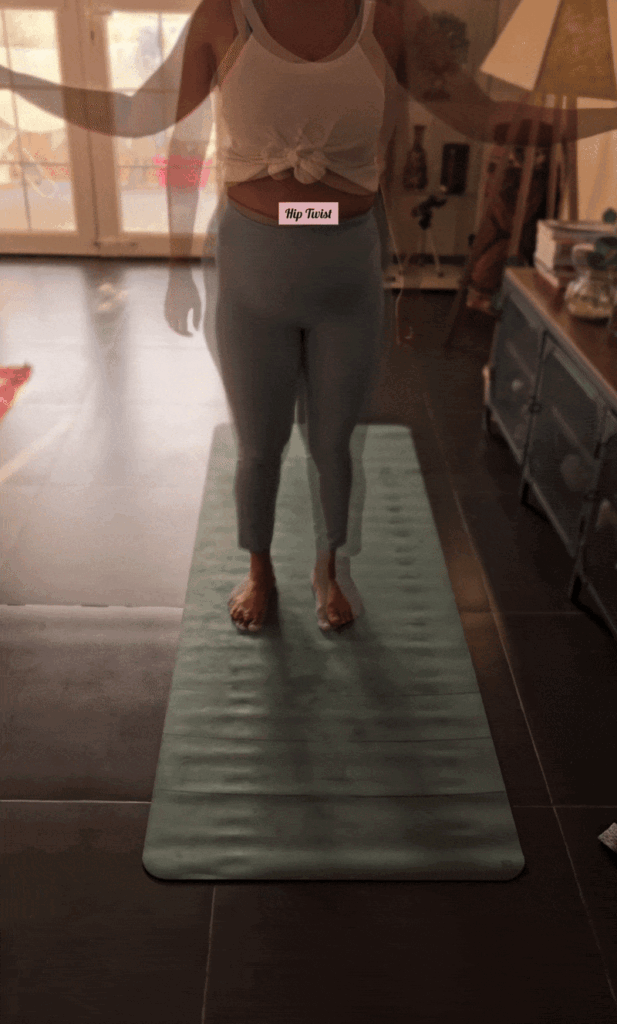
3. Pelvic Twist (Standing)

Description:
This movement brings focused awareness to the pelvic joints and gently unlocks stiffness in the lower back and hip area. It’s subtle, controlled, and especially helpful in connecting with the muscles below the belly button — an area often ignored in daily movement.
How to Do It (Step-by-Step with Verbal Cues):
- Stand tall with your feet hip-distance apart.
- Contract your lower abdomen slightly — feel the core engage.
Keep your chest lifted, shoulders drawn back, and knees softly bent (not locked or overly bent). - Twist your left hip forward, allowing your right hip to move slightly back.
🗣️ “Let this rotation happen from deep within — below the belly button. Your upper body stays completely still.” - Return to center, keeping your hips and shoulders facing front.
- Now, twist your right hip forward, letting the left hip move gently back.
🗣️ No shifting side to side — it’s a twist movement from your pelvis, not your ribs.
🔁 Twist from side to side, allowing the pelvis to wring gently like a cloth being twisted from its base — without the chest following along.
Important Tips:
- Don’t twist your chest or ribs , they are facing front. Your nipples should face front.
- Focus on the area below your belly button — this is pelvic work, not spinal.
- Keep the movement grounded, both foot on the floor — no bouncing, no jerking.
- Keep ur lower abdomen enegaged
What It Works:
- Mobilizes the hip and pelvic joints
- Releases tension in the sacral-lumbar area
- Awakens and strengthens deep core and pelvic muscles
- Builds subtle mind-body awareness in your hip region
Duration:
6–8 twists (3–4 each side, slow and intentional)
4. Figure 8 – Horizontal Hip Circles
Description:
This is a smooth, flowing movement where your hips trace the shape of a horizontal figure 8 (like an infinity symbol ♾️). It’s great for mobilizing your hips, releasing stiffness around the pelvis, and improving lower-body coordination — all without needing any dance background.
How to Do It (Step-by-Step with Verbal Cues):
- Stand with your feet grounded and flat, about hip-width apart.
- Keep your chest lifted, core gently engaged, and knees soft (not locked).
- Lift your left heel slightly off the floor as you twist your left hip forward.
🗣️ “Think of gently turning your left hip toward the front corner of the room.”
Your right foot stays flat while your upper body remains facing forward. - Now, shift your weight across from left to right, letting your left hip move diagonally back — like it’s sliding behind you — but without changing your feet position.
🗣️ “Slide your left hip across your body toward the back of your right heel.” - As you arrive over your right foot, set your left heel back down, so now both feet are flat on the ground.
- Now repeat the same with the right hip:
- Lift your right heel, twist right hip forward, then
- Slide the right hip diagonally back toward your left heel and set the foot down.
🔁 Merge both sides into a flowing movement — forward, across, back, and around — creating a smooth, horizontal figure 8 with your hips.
Verbal Cue to Help Visualize:
🗣️ “Imagine drawing an infinity symbol with your hips — smooth, wide, and relaxed — like your hips are gliding across soft sand.”
Important Tips:
- Keep your upper body stable — no swinging arms or rotating the chest.
- Focus on letting the hips glide, not jerk or bounce.
- Don’t rush. It’s okay to break it down slowly until it feels natural.
- Breath cue: Inhale as one hip comes forward, exhale as it slides back.
What It Works:
- Improves pelvic coordination
- Enhances hip flexibility and fluidity
- Builds confidence in body isolation and control
- Releases deep tension around the sacroiliac joint
Duration:
6–10 reps (3–5 figure 8s on each side)
Integrating Pelvic Mobility with Feminine Flow
This Feminine Flow Mobility Routine is designed to help you reconnect with your body through gentle, intuitive movements. By practicing pelvic tilts, hip circles, twists, and figure eights, you enhance your body’s mobility and embrace the natural rhythms of feminine energy.
Whether you’re standing, on all fours, or kneeling, these movements invite you to explore your body’s range with grace and awareness. Regular practice can lead to improved posture, reduced tension, and a deeper connection to your inner self.