Sitting Poses During Second Trimester (Mid Pregnancy) -16 to 34 weeks
Child Pose/ Shashankasana
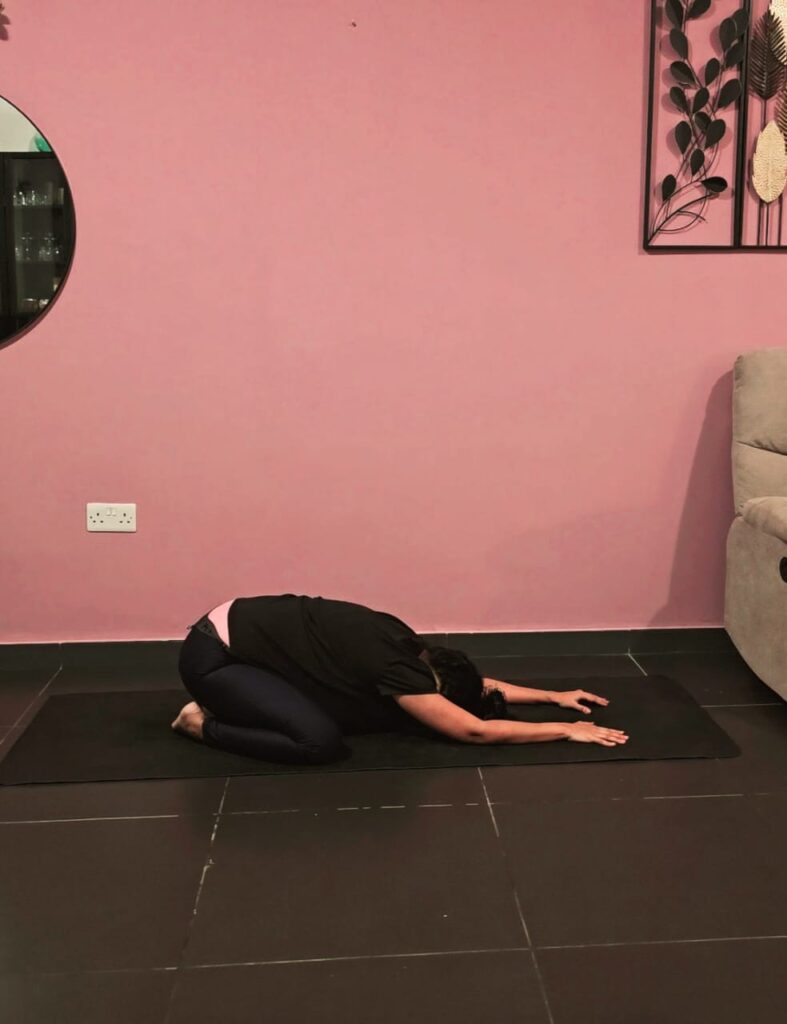
This is the ideal resting posture. Starting from all fours (the cat position), move your knees slightly wider apart to create enough space for your belly to rest. If it feels comfortable, bring your toes closer together as your knees move wider apart.
While exhaling, round your lower back by contracting your lower abdomen or imagining pulling your abdomen back towards your spine.
Gently move your buttocks back towards your heels.
Rest your buttocks on your heels and place your forehead on the floor. If your forehead doesn’t reach the floor while your buttocks are on your heels, you can use a block or bolster under your forehead for support.
If it feels comfortable, stay in this position for up to ten breaths or as long as you feel at ease.
The child Pose is a relaxing and calming posture, particularly for pregnant women in the early stages of pregnancy.
As the pregnancy progresses and the bump grows, many women prefer extra height for support.
Sitting on two or three blocks, or cushions, creates a higher surface for the buttocks to rest.
Adding a cushion, bolster, or folded blanket under the head can make it even more comfortable.
Adjust the height so your body leans slightly forward instead of lying flat. This can be achieved using a chair, beanbag, or even the seat of a sofa.
This higher support is useful if the regular pose causes nausea, heartburn, or breathlessness.
For those who experience discomfort in the knees or ankles when lowering the buttocks, placing cushions or a blanket behind the knees can provide added relief before settling into the pose.
Janusirsasana/ Half Angle Pose
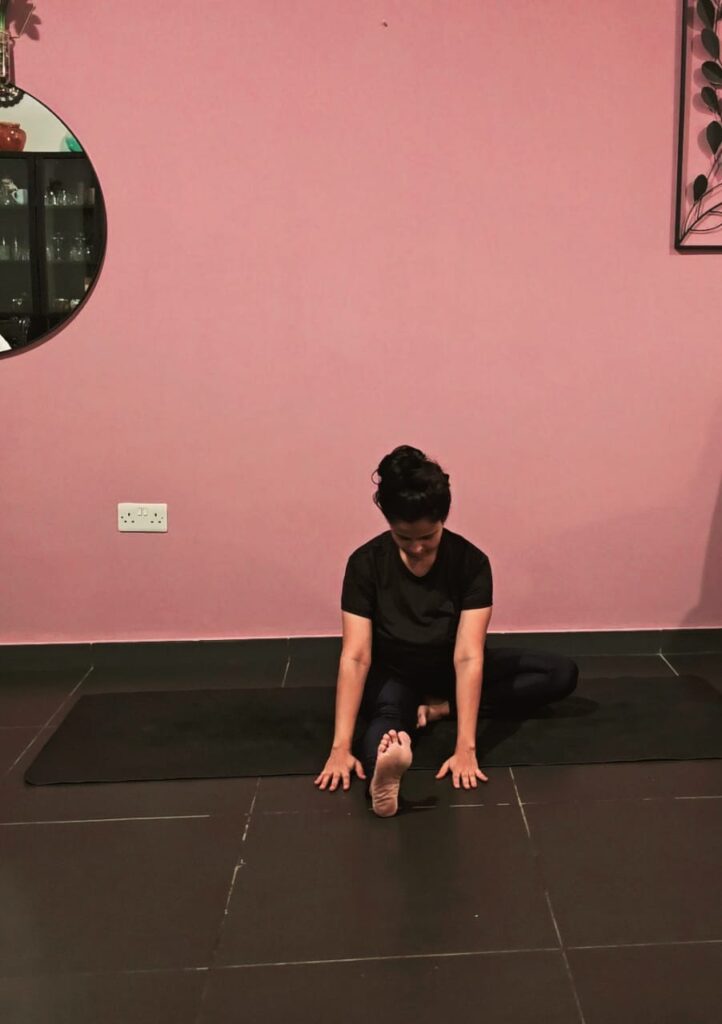
This posture helps stretch the back of the knees, calf muscles, hamstrings, and Achilles tendons. It also opens up the pelvis and strengthens the spine.
- Start Position: Sit in a basic seated position with your legs stretched out in front of you. Bend your right knee and place the foot close to your inner left thigh. Avoid pulling the right knee too far back; instead, position it at a comfortable distance. Keep your left foot active by pushing the inner edge of the foot outward.
- Hand Placement: Place your palms on either side of your left thigh and direct your gaze towards your left foot. If it’s challenging to place your palms on the floor, you can use a yoga belt for assistance.
Important: At no point should there be any compression on your abdomen. If placing your hands down causes your abdomen to press against your thigh, use a yoga belt to maintain proper alignment. Always practice this posture on both sides for balance.
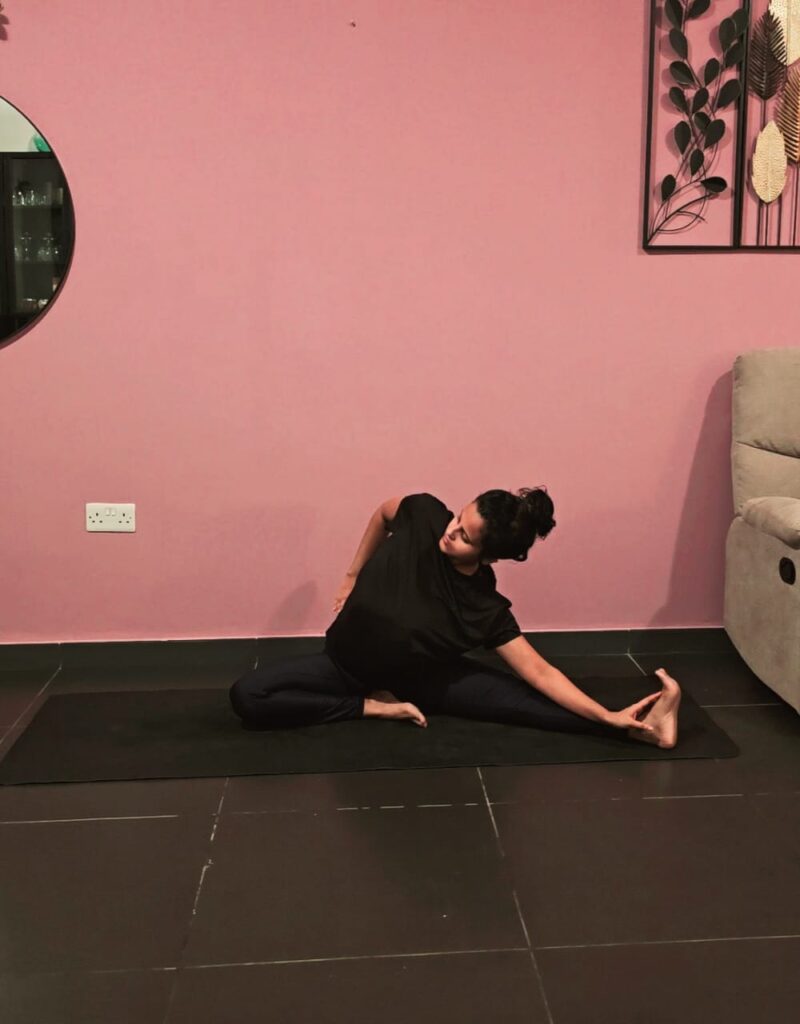
Parivrtta-Janusirsasana-Prenatal-Yoga
Starting Position: Sit with your legs spread wide apart. Allow your body to settle in, ensuring your lower back, hips, sitting bones, and the backs of your legs are fully grounded and stable.
Relax and Breathe: Let your lower spine relax and focus on your breathing. Inhale deeply to expand your chest, and as you exhale, ground yourself and release any tension.
Feel the Movement: Take slow, deep breaths, noticing the extension and lengthening of your spine with each inhale and the grounding effect with each exhale.
Modify for Comfort: When you’re ready, bend your right knee and place your right foot on your left inner thigh. Slowly lean to the left, extending your left arm toward your left foot. Stretch only as far as feels comfortable and natural. If necessary, loop a belt around your left foot for added support
Maintain Stability: Ensure your right hip and sitting bone remain grounded on the floor. This stability is essential for maintaining balance and avoiding strain.
Open the Rib Cage: Place your right hand comfortably on your right hip. Push your right shoulder back, lift your chest upward, and create more space in your rib cage. This adjustment will help you breathe more deeply and with ease.
Baddhakonasana(Butterfly) Prenatal Yoga
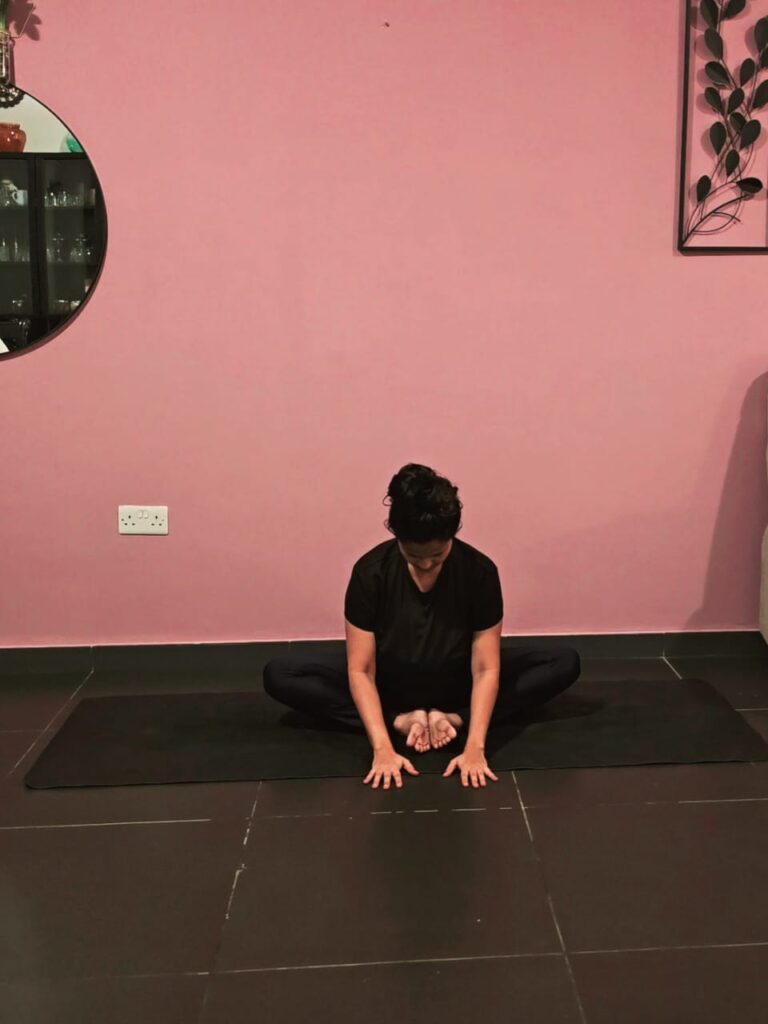
This foundational pose, also known as Butterfly Pose is a grounding posture that benefits the pelvic area and reproductive organs. It improves joint mobility, widens the pelvic region, and enhances blood circulation to the entire pelvic region. During pregnancy, this pose can help you understand how your body opens during childbirth. Practicing this pose for up to 10 minutes each day can help position the pelvis correctly and improve posture.
Safety Note: Practice with gentleness – avoid forcing your feet too close to pelvis or pushing your knees down aggressively. Keep your movements fluid and relaxed, coordinating them with steady breaths. Never bounce or rush.
Basic Position:
- Begin seated on the floor, using wall support if needed
- Draw your feet together, allowing the soles to open like a book while keeping the outer edges touching
- Position the feet at a comfortable distance from your body
- For added comfort, place cushions under your knees if they don’t naturally reach the floor
- Focus on grounding and breath awareness
Upavishta Konasana
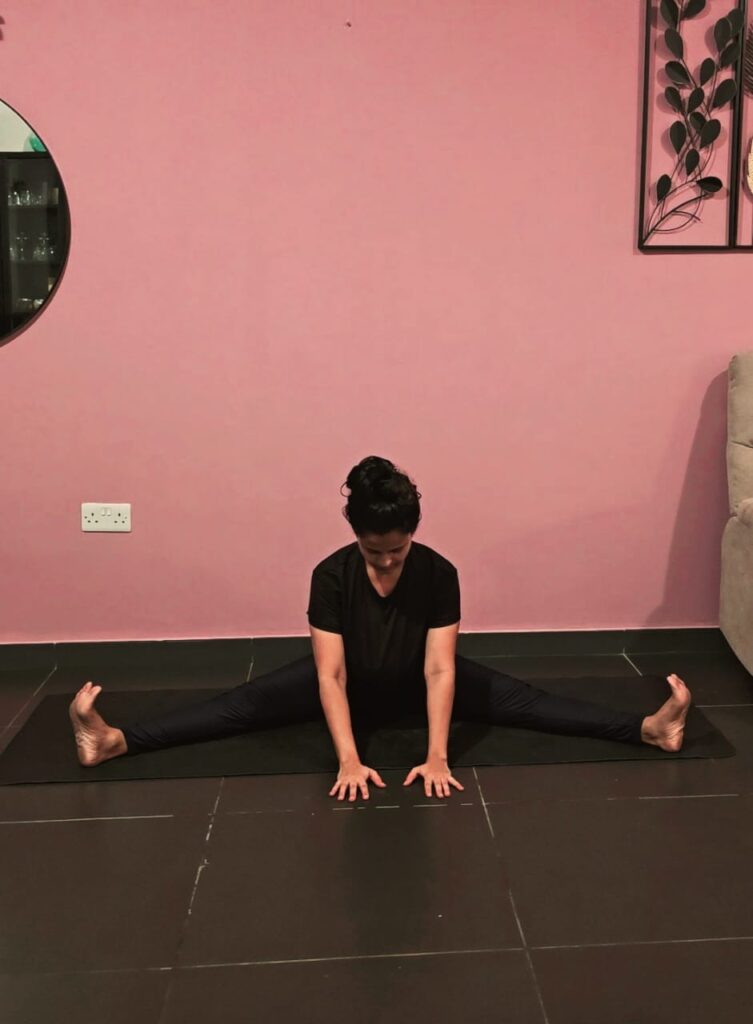
Upavishth Konasana is both comfortable and beneficial during pregnancy.
This pose grounds the pelvis, widens the pelvic region, and promotes a sense of openness.
It increases the mobility of hip joint, while stretching the inner thighs and backs of the legs.
This pose also helps release tension from your back, neck, and shoulders..
Regular practice can boost your confidence as you prepare for childbirth. by helping you feel how your pelvis naturally opens and relaxes. It makes you to feel the widening and loosening of the pelvis, at the same time making space for the baby.
You can Practice whenever you like, especially during breathing exercises. You can alternate between this pose and the butterfly pose for variety.
Getting Started:
- Sit on the floor, using a wall for back support if needed. You can also sit back-to-back with a partner, or have them support your spine with their feet.
- Open your legs comfortably wide – focus on feeling relaxed rather than how far you can spread them.
- As the third trimester approaches, your ligaments become increasingly loose due to the release of a hormone called relaxin. This hormone helps loosen the ligaments to facilitate childbirth.
- In this pose, gently move your legs apart without any sudden jerks. At the same time, place pillows under both knees for added support.
- During the third trimester, relaxin can make your body feel more flexible. While this may increase your range of motion, it is important to focus on controlled movements. Stretch only up to 70% of your usual capacity to avoid overexertion and always use proper support to stay safe and comfortable.
Parighasana
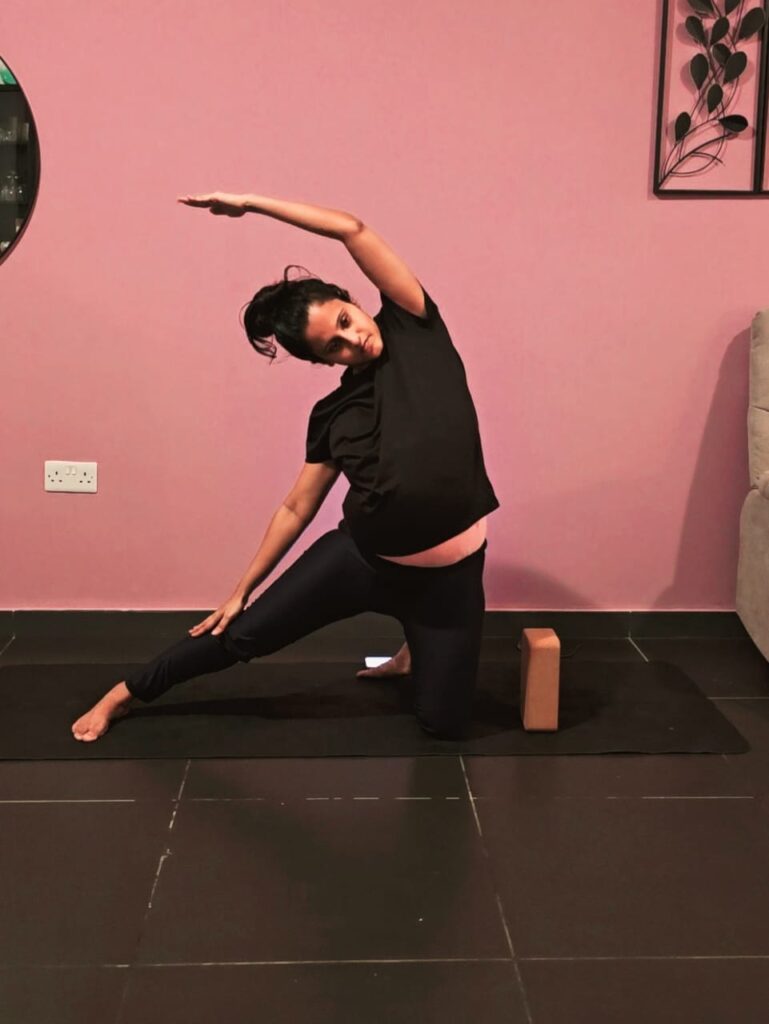
This pose is excellent for stretching your side hips, obliques, and overall side body.
Getting Started:
- Start on all fours and stretch your right leg out to the right side, aligning your right heel with your left heel.
- Practice the pose on both sides. On the bent knee side, place a block under your left hand for support. Rest your left palm on the block and gently take a side bend.
- On the right side, place your right palm on your leg or hip, and stretch the left side of your body.
Important:
Focus on pushing your hip forward rather than going down. Lift your chest up, rotate your shoulders back, and then bend as far as feels comfortable. Always prioritize maintaining proper alignment and ease in the posture.
Pigeon Pose
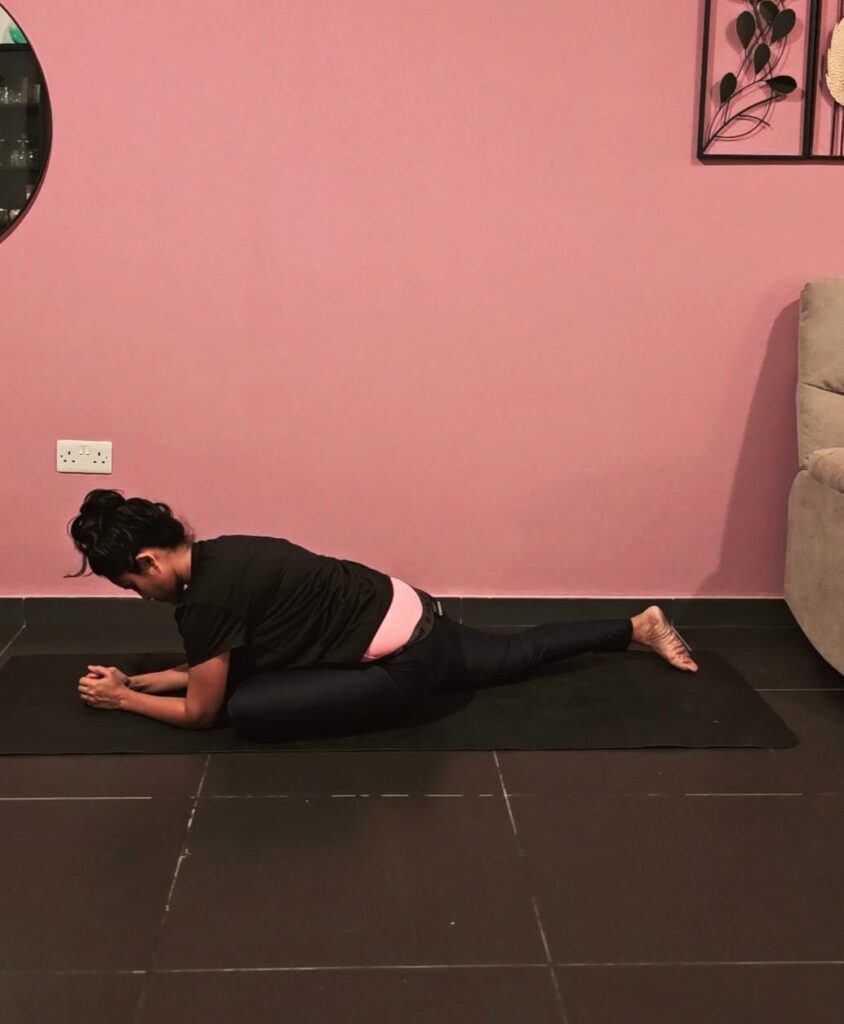
Pigeon Pose is one of the best and most popular hip openers. It is excellent for opening the pelvis, stretching the quads, and targeting the lower body.
However, its greatest benefit is providing relief from buttock pain, often caused by sciatica, which is common during pregnancy. This pose is highly effective in alleviating sciatica pain.
That said, it’s important to note that buttock pain can sometimes result from weak glute muscles, a weak core, or other underlying issues.
As a prenatal yoga teacher, I’ve seen different responses to yoga. One lady experienced severe buttock pain, and practicing yoga initially aggravated her discomfort.
On the other hand, another lady found significant relief from sciatica after incorporating yoga into her routine.
It is always advisable to consult your doctor before starting any exercise program, especially during pregnancy, to ensure it is safe and beneficial for your specific condition.
Getting Started
You can start this pose from either Mountain Pose or on all fours.
Bring your right leg forward and place it in the shape of the number four.
Position your right foot wherever it feels comfortable, ensuring stability.
Place both palms on the floor, take a moment to settle down, and focus on your breath.
Inhale and exhale deeply to relax into the position.
When ready, slowly lower your elbows to the floor. Keep in mind that placing your elbows down depends on your flexibility.
For regular practitioners, this might feel easier. However, if you are new to yoga during pregnancy, it could be more challenging.
If needed, use two blocks to support your elbows. Place the blocks at a comfortable height and rest your elbows on them.
Hold this position for 30 seconds to 1 minute, or longer if you feel comfortable.
Important Note:
Avoid placing the heel of your bent knee on your abdomen.
There should be no compression on the abdomen. Instead, position your heel below the abdomen, resting on the pelvic bone.
Malasana/Garland pose
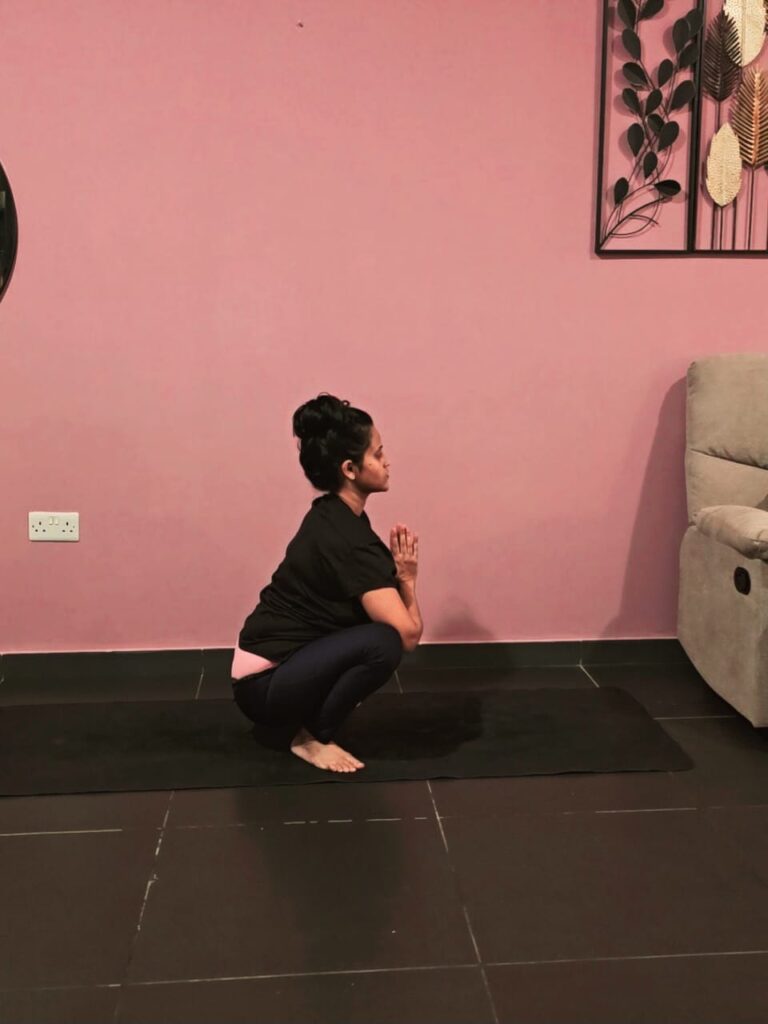
Squatting is one of the most important exercises you can do during pregnancy.
It’s a natural position for giving birth because it helps open your pelvis fully and creates the ideal angle for your baby to move down during labor.
By practicing squats regularly, you can improve the flexibility and mobility of your hips and pelvic joints while also helping your pelvis stay properly aligned.
This position supports your uterus and helps your baby stay in the right spot, preparing both of you for a smoother birthing process.
In the final weeks of pregnancy, squatting can even encourage your baby’s head to engage into the pelvic area, making it easier when labor begins.
Plus, getting comfortable with squatting now will help you feel more at ease using this position when it’s time to give birth, whether you’re doing it naturally or with support.
When you squat, the muscles in your back, bottom, and pelvic area naturally stretch and relax, while the muscles in the front of your body gently tighten to support you.
This position helps your pelvic area relax and increases blood flow to the whole region.
Over time, practicing squatting regularly can make the tissues in your birth area more flexible and stretchy. This can help reduce the chances of tearing during the final stages of giving birth, making the process a bit easier for your body.
Getting Started
To get into a squat, start on all fours, then bring your right leg forward, followed by your left leg, and lower yourself down into a squatting position.
While squatting, it’s important to be a little cautious because, during pregnancy, the hormone relaxin makes your ligaments softer and more flexible.
This can sometimes lead to pelvic girdle pain or make it hard to squat comfortably.
If squatting feels difficult or uncomfortable, you can use props like a bolster or blocks under your hips for support. Depending on your flexibility, you might need two bolsters, two blocks, or even a chair to help you squat safely.
In my classes, I’ve worked with women who couldn’t sit down even with a block or bolster, so we added extra props like 2-3 bolsters or a sturdy chair to make it work for them.
While squatting is very beneficial, it’s just as important to listen to your body and use whatever support you need to stay safe and comfortable.
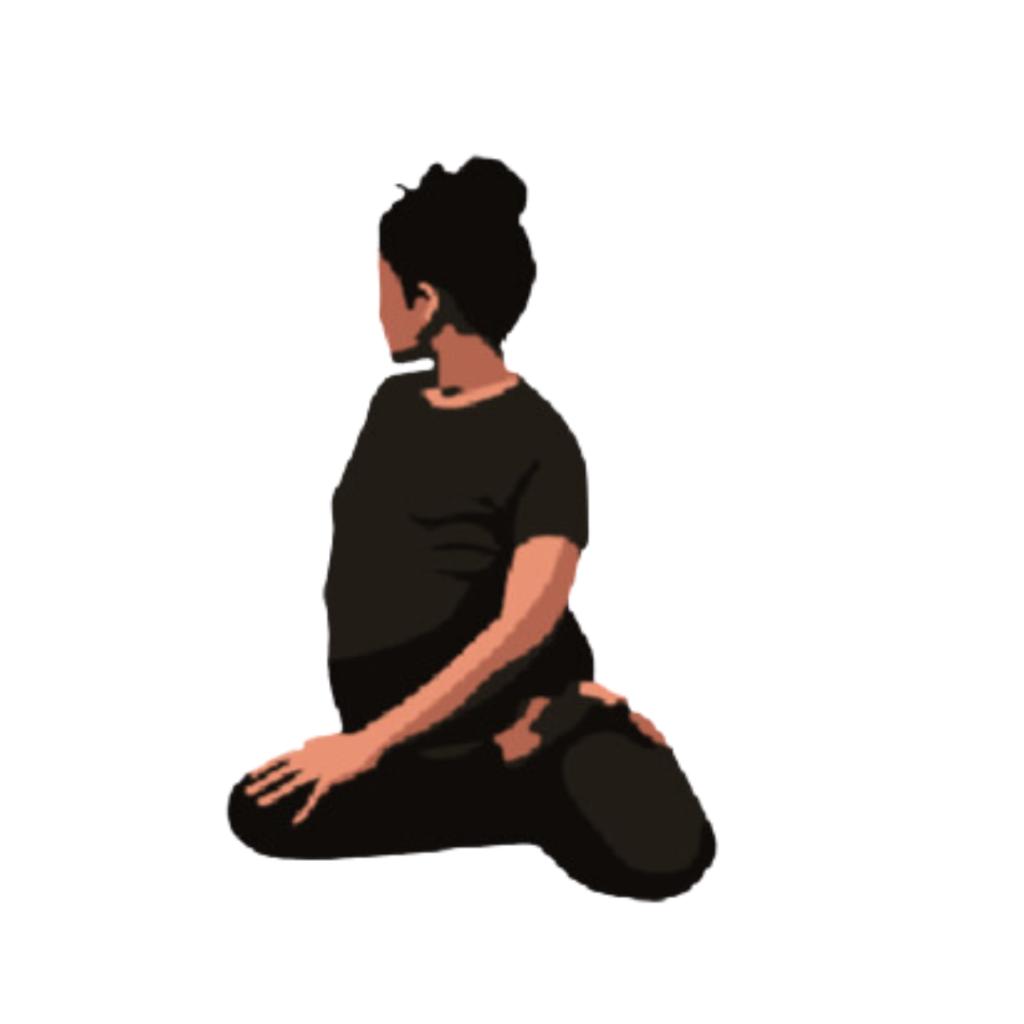
Veerasana/Hero’s Pose
Thunderbolt and Hero poses are simple seated positions that help you keep your back straight and strong.
In Vajrasana, you sit back on your heels with your knees together.
In Virasana, your feet are placed wider apart, and your hips rest between your heels.
During pregnancy, these poses can sometimes feel uncomfortable because your legs become heavier. Sitting directly on your legs may also worsen varicose veins.
To make these poses easier and safer, you can use some support, like a bolster or blocks, to take the weight off your legs and feet.
Getting Started
Place a bolster, rolled blanket, or yoga blocks in the middle of your mat. The prop should be firm and steady.
Start by coming onto all fours. Position the middle of your calves on either side of the prop.
With your hands, gently roll your calves to the side to create space, then lower your hips and sit on the prop.
Sit upright, letting your sitting bones rest firmly on the prop.
Adjust your knees and feet until you feel balanced and comfortable.
The position should feel stable, with your lower back in a natural, comfortable curve.
Caution:
If your lower back feels uncomfortable or if you experience pain in your knees or ankles, it’s a sign that the height of your support might need adjusting.
Look out for signs like your lower back feeling compressed, pressure on your knees or ankles, or overstretching at the tops of your feet. These indicate that you may need to raise your support.
If you feel like you’re tipping forward, it could mean your support is too high. In this case, try lowering it slightly to find balance.
Everyone’s body is unique. Factors like your pelvic tilt, the length of your legs, and the size of your baby bump will affect how you feel in this position.
Take your time to experiment with different heights. Adding more support as your pregnancy progresses can help you stay comfortable and relaxed during the pose.
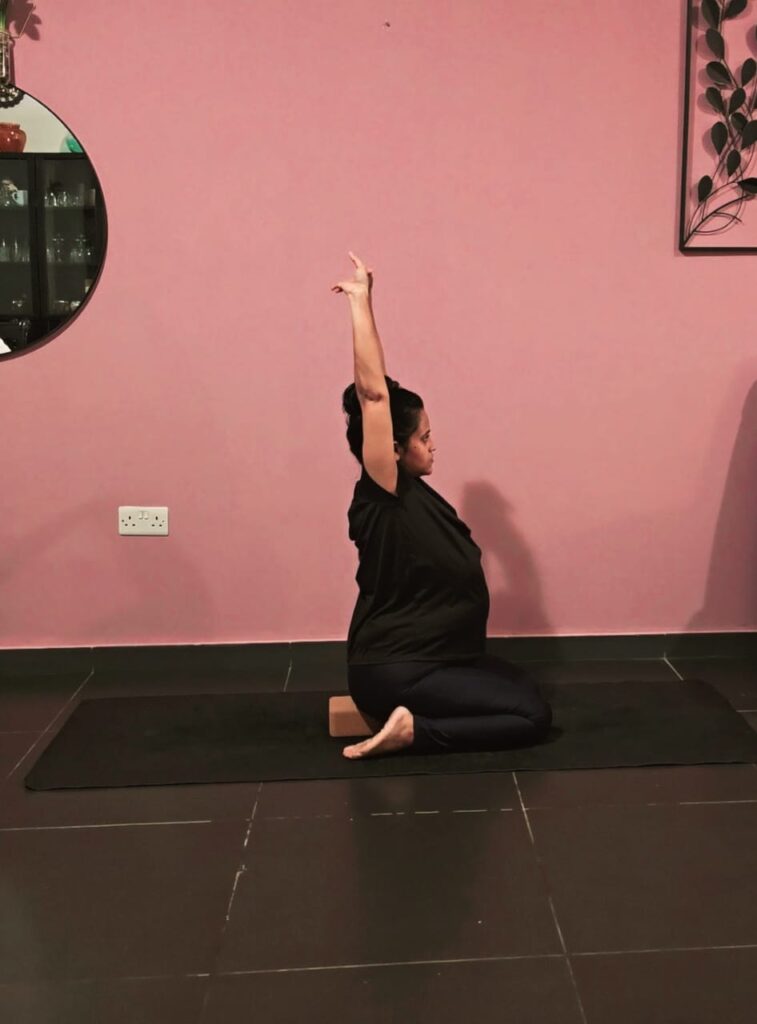
Twist Prenatal
Twisting movements are great for keeping your spine flexible and releasing stiffness.
They help the joints in your spine move better and increase the secretion of lubricating fluid, making the effect similar to oiling your spine.
This keeps your back feeling comfortable and helps improve overall mobility.
Start by sitting comfortably with your legs outstretched in front of you. Sit up tall, imagining a string gently pulling the top of your head toward the ceiling. If your hips feel tight, use a cushion or yoga block to sit on for extra support.
Steps:
- Set Your Left Leg: Bend your left knee and place the top of your left foot on the floor, like in Virasana (Hero Pose). Adjust until your hips feel relaxed and your knee is comfortable.
- Position Your Right Leg: Lift your right leg and place your right foot on your left thigh. If this feels challenging, rest your right foot closer to your shin on the floor instead of on your thigh.
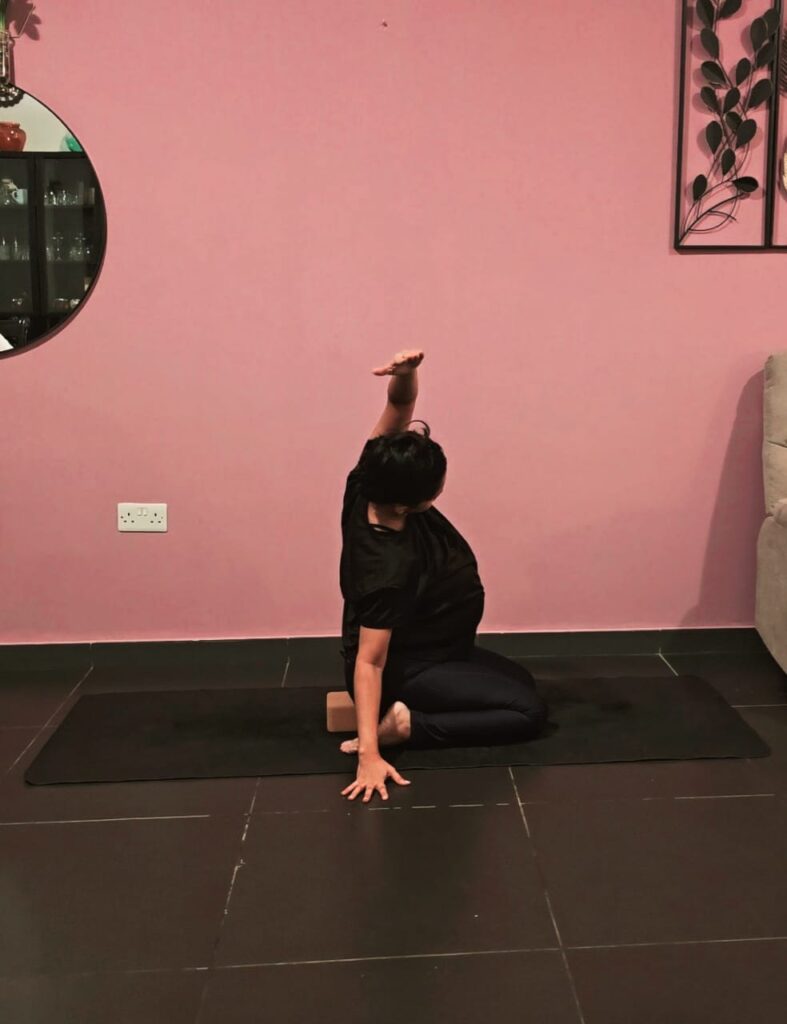
- Add the Gentle Twist:
- Place your left hand on your right knee.
- Place your right hand behind you for support. Options for your right hand:
- Rest your fingertips lightly on the floor.
- Use a block under your hand if the floor feels too far.
- Hold a yoga strap looped around your right foot, or if you’re flexible enough, directly hold your right foot with your right hand.
Alignment Tips:
- Keep your spine straight and tall, as though it’s lengthening with each breath.
- Avoid leaning back; focus on keeping the twist light and centered on your upper back and shoulders.
- Make sure your abdomen stays relaxed, with no compression.”
Ananta-Shayanasana

This asna is good for increasinf hip mobility , loosen the pelvic muscles.
Getting started
Lie down on your left side, ensuring your elbow, shoulder, hip, and heel are all aligned in a straight line.
Place your right hand gently on your abdomen for support.
Slowly lift your right leg upward while keeping your left leg firmly planted on the ground. Move slowly and with control.
Repeat this movement 5 to 6 times. On the last repetition, hold your leg in the lifted position for 5 deep breaths.
Caution
Remember, during pregnancy, your ligaments are already more relaxed due to the hormone relaxin. Be gentle and move slowly to avoid overextending.
Do not lift your leg to a full 90 degrees; instead, aim for a range of about 40–50 degrees.
Headstand
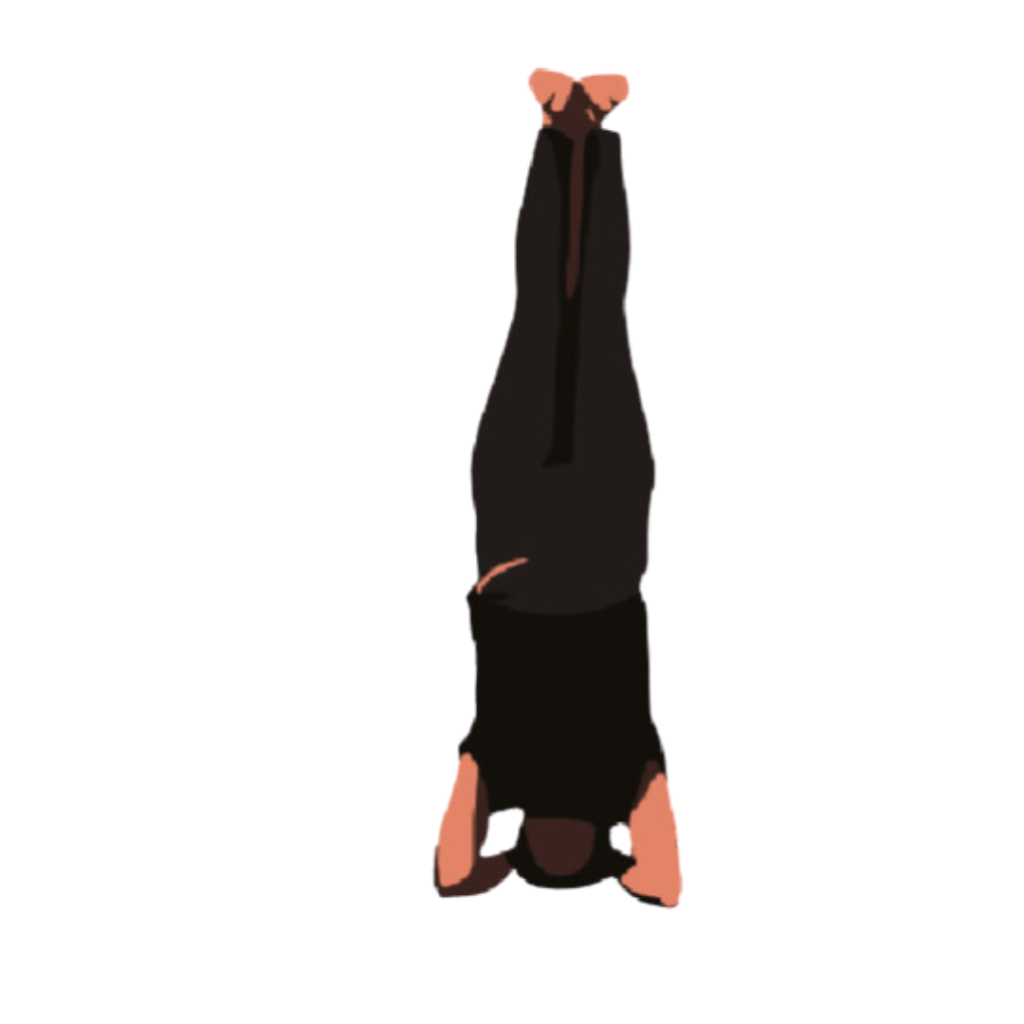
Headstand is a strong and refreshing pose that can be done during pregnancy if you’ve been practicing it regularly and know how to do it safely.
It’s really important to focus on doing it correctly to avoid any strain, especially with the extra weight your body is carrying. Always listen to your body—if it feels uncomfortable, it’s best to stop. If you’re not fully confident, try doing it with support from a wall or a partner for extra stability.
Setu-Bandhasana-Bridge
To practice bridge pose, lie on your back with your knees bent and your feet flat on the floor, about hip-width apart. Keep your heels close to your hips, and rest your arms by your sides with your palms facing down.
- Start by taking a few deep breaths, feeling your lower back relax and your waist sink into the floor. Let your feet feel firmly grounded.
- As you breathe out, press your heels into the floor and gently lift your hips. Let your back slowly rise off the floor, one step at a time, starting from your lower back and moving up toward your shoulders.
- Hold this position for a moment while breathing normally. Then, slowly lower yourself back down, one vertebra at a time, starting from your upper back and moving down to your hips.
- Relax for a moment and repeat this two or three times. A few tips to keep in mind: If you feel any discomfort or strain in your lower back, slide a yoga block under your lower back for support. This will help reduce pressure and make the pose more manageable.
- Avoid pushing yourself forcefully. Instead, gently follow each step, focusing on how your body feels as you move. Important Reminder:
- If you start to feel uncomfortable or the pose feels unnatural, stop immediately and come back to a resting position. Your safety and comfort are the priority. It’s always better to ease into these postures gradually rather than forcing yourself into them.
Pavana-Muktasana
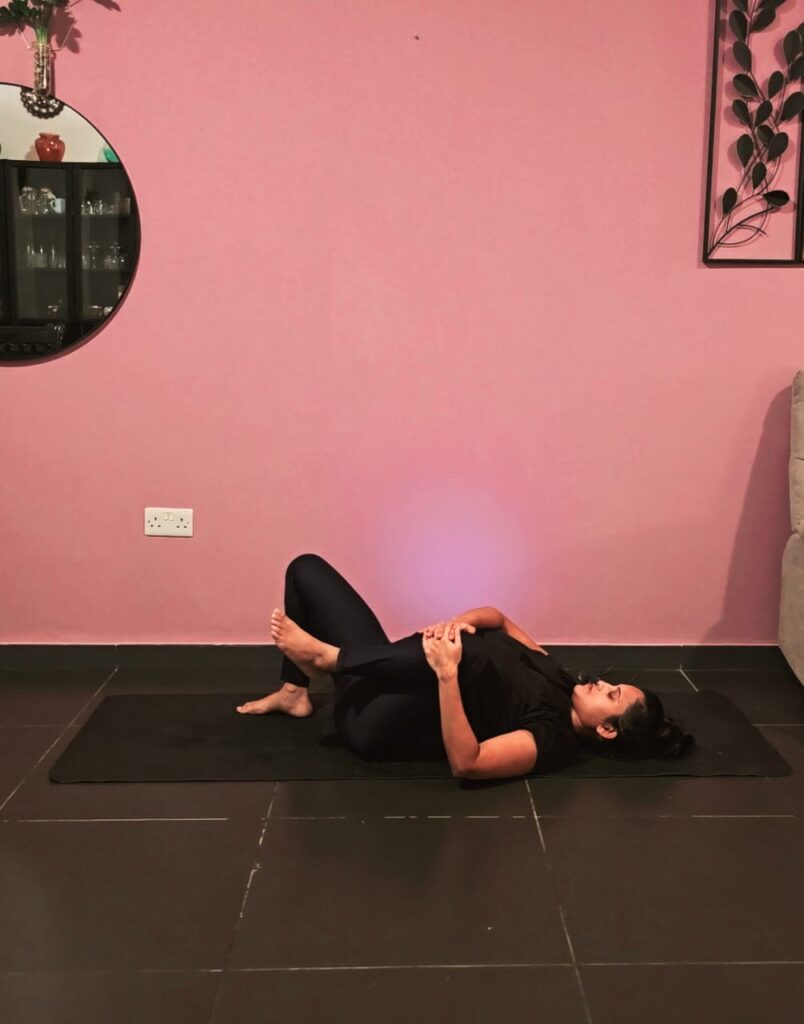
This pose is wonderful for releasing tension in your back and easing sciatica.
It gently stretches your glutes and back muscles, giving you relief and improving flexibility.
But during pregnancy, we need to make a few adjustments to keep it safe and effective.
How to Practice:
- Lie on your back with both knees bent and your feet flat on the floor.
- Gently bring one knee toward your chest, but make sure it doesn’t press on your abdomen. Let it stay slightly to the side for more space and comfort.
- Keep your other knee bent and foot grounded to maintain balance and prevent overstretching.
- Hold your knee with both hands and take a few deep breaths, feeling the stretch in your back and glutes.
- Slowly release and switch to the other leg.
Important Tips:
- Your body is already more flexible during pregnancy because of the relaxin hormone, so be mindful not to overstretch. Focus on comfort, not pushing too far.
- If you feel any discomfort in your lower back, place a small pillow or bolster under your hips for extra support.
- Move slowly and stay connected with your breath.
Jatara-Parivartanasana
This pose is fantastic for opening up your pelvis and stretching your lower back, giving you relief from any tension or discomfort.
It’s also a gentle way to relax your body and improve flexibility during pregnancy.
Practice These Asanas for a Smoother Delivery and Reduced Labor Pain – Strengthen Your Body and Support Your Baby’s Journey!!
Baddha Konasana (Bound Angle Pose / Butterfly Pose)
Upavishta Konasana (Seated Wide-Angle Pose)
Janu Sirsasana (Head-to-Knee Pose / Half Angle Pose)
According to Geeta S. Iyengar, these three āsanas—Baddha Konasana (Butterfly Pose), Upavishta Konasana (Seated Wide-Angle Pose), and Janu Sirsasana (Head-to-Knee Pose)—are highly beneficial during pregnancy. Regular practice can ease delivery, minimize labor pains, facilitate the passing of urine, regulate vaginal discharge, and help maintain a broad pelvic region, providing space for fetal movement. These poses also strengthen the spine, offering crucial support for expectant mothers.
Important: If you are practicing yoga for the first time, ensure you do so under the guidance of a certified prenatal yoga teacher to ensure safety and proper technique.
Standing Poses During Second Trimester (Mid Pregnancy) -16 to 34 weeks